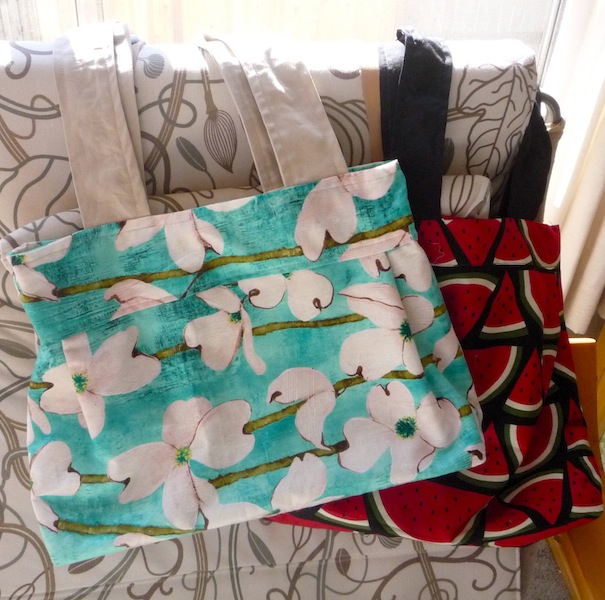
Here are the pieces for the flowered bag (it's a dogwood blossom pattern, but I thought the colors were tropical enough for a beach bag) -
- Two 18" x 22" rectangles of fabric for outside of bag
- Two 18" x 22" rectangles of contrast color (or lining) for the lining of bag
- Four 4" x 18" rectangles of fabric for top of bag (you can use the contrast color for this if you only have a little bit of your main fabric)
- Two 6" squares of fabric or contrast for a pocket
- Two 6" x 22" rectangles of contrast color for handles
- Two 5" x 16" rectangles of fusible interfacing to stabilize the bottom of the bag

Great! Now let's make a pocket. Put the two squares you cut right sides together and sew along one edge. Flip them right side out and press flat. Now press in .5" on the raw edges on the three unsewn sides so you have three sides with the raw edges pressed out of sight and one finished edge. Pin the pocket to the right side of the lining in the center, about three inches from the top.

Sew the three raw edges and tie the loose threads on the back of the lining so they will be hidden inside the bag. I sewed it twice for extra stability.

Great! Now we'll give the bag a flat bottom. Cut two inch squares from the two bottom corners of both the outside and inside of the bag's body (your 18" x 22" rectangles - you can see these cuts in the picture above). Sew the body of the bag by putting the rectangles right sides together and sewing along the bottom and sides of the bag. Do the same with the lining. Press these seams open and flat.
Now pinch these newly cut edges right sides together and sew. This will be about a 5" seam because of the seam allowance. Sew this seam on both corners of the bag and both corners of the lining (4 seams). Now the outside of the bag and the lining have rectangles (about 5" x 16") that will be the bottom of the bag. Stabilize both by attaching your interfacing to these rectangles.

I like the bag to stay attached to the lining because it seems neater that way, so I sew the bag to its lining at the bottom corners. Simply put the bottoms together (interfacing to interfacing) and sew along the two side seams as shown below.

Turn the bag rightside out. It's starting to look like a bag! Take a moment to admire it (and make sure everything's right): you should see the basic shape of the bag with your fabric on the outside and the lining in the inside, seams between the fabric and lining where you can't see them. You can also see where the pocket is and decide if it needs to be adjusted. If you want to move the pocket, now's the time!

Now make the handles by putting the right sides together and sewing along one long edge. Turn them inside out and press flat. I topstitched each handle on both sides to make them extra sturdy.
To make the top of the bag, Take the top pieces and sew each end right sides together. You'll have two circles - press each seam flat. Turn one of the circles and place one in the other, right sides facing each other. Put the handles in place: put each end about three inches from the side seam and leave an inch or more sticking out the bottom, as in the picture below. Sew along the bottom edge, being careful not to catch the tops of the handles.

Now turn both sides of the top of the bag under and topstitch. This is the top of your bag and the topstitching gives the handles a little extra strength.

Fold under the bottom sides of the top of the bag and press. If one side looks better than the other, you can turn this whole section inside out. Make sure the better-looking side is facing out, of course. Now make the pleats in the bag's body by measuring two inches from the side seam and pinching a 1" pleat in all four top corners of the bag. Pin the pleats in place. Slide the top onto the bag so that the bag's body is inside the top. Adjust the pleats so the bag's body and top are snug. Pin in place and sew along the bottom edge of the top of the bag.

Tie off the ends and you're done!

It was such a fun project that I also made a watermelon bag for my mom!
I hope this is clear. I've never written a tutorial before.
Thanks for reading!
Cate
Love your site! Beautiful totes! (Purses?)
ReplyDelete